

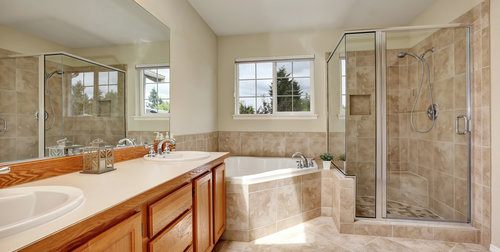
Our simple steps to follow to manage and how to seal a shower plate are the correct method to guarantee you accomplish an expert outcome. You’ll additionally discover how to expel the old sealant and set up the territory prepared for the new silicone sealant. Supplanting the sealant around your shower plate gives a basic yet successful approach to spruce up the vibe of your washroom.
Great silicone sealant–ensure it’s intended for restroom use and that it contains a bacterium of contagious added substance. Utilize the correct sort of sealant – on the off chance that you’ve utilized regular stone for the floor and divider covers you’ll have to choose a sealant that is perfect with this kind of material. Sealant application firearm this permits you to apply the sealant uniformly and accomplish a predictable dot.
Silicone sealant application device is intended to evacuate abundance sealant.
Paper towels – while smoothing the sealant you’ll have to clean the abundance with a paper towel.
Here are some guidelines to Complete Shower Seal tray efficiently
1. Check target zone is dry
Check that the shower plate and dividers are totally dry, and liberated from earth and residue.
2. Select the right opening size
In the event that utilizing a device to smooth the sealant, select the right opening size so the completed dab totally covers the hole between the tiles and plate.
3. Cut the application spout
Cut the application spout on the sealant tube at a 45 degree point, guaranteeing the gap isn’t too large. The spout will have marks showing where and how to trim the spout. A 5 mm gap is normal for most of the utilization, however it very well may be broadened if a more extensive globule is required.
4. Apply an even dab of silicone sealant
Start in the internal corner of the shower plate, apply delicate strain to the trigger of the application weapon and work towards the front of the plate in one constant development. Guarantee that an even dab of silicone is applied. Try not to apply as much as it would be precarious to evacuate.
5. Ensure there are no noticeable holes
The dab of silicone sealant ought to be sufficiently thick so it covers the hole between the plate and tiles. Ensure there are no noticeable holes, if there are any, cautiously add somewhat more sealant to the zone.
6. Wipe the overabundance away
When you’ve finished each line of sealant, discharge the weight from the application firearm or it will keep on spilling out of the spout. Wipe the abundance away and supplant the top.
7. Smooth out the sealant
Spot the smoothing instrument against the plate and tiles, start from where you previously applied the sealant and apply delicate yet steady weight pulling the apparatus along the length of the plate to expel abundance sealant leaving an even globule. At the point when you’ve made a smooth dab don’t continue smoothing the sealant as it will tear, become chaotic and may not follow accurately.
8. Leave to completely dry
The new silicone sealant ought to be left to dry for at least 24 hours.