

Virtual platforms today have become the primary mode of communication and entertainment for people all around the world. One thing a lot of people struggle with is having to save these online audio conversations or even other files.
Besides, many applications still don’t allow online audio recorders to overlap them when in use. This usually forces an individual to either remember the entire information or write it down somewhere, so that it can be downloaded later.
But with applications like the Movavi Screen Sound Ripper, this process can be facilitated. In order to give you more information about how to capture online audio, here is an article.
Benefits of an online audio recorder
Save important conversations
One of the first benefits of using an online audio recorder is that you get a chance to save important conversations. Imagine attending an online business conference and having to write down each and every detail. Instead, you can now use an online audio recorder for added convenience.
High-quality audio
Most audio recorders available out there do not produce a high-quality sound. This eventually leads to the audio file being inaudible or with glitches. In order to save people from such a thing, the above mentioned online audio recorder provides you with a high-quality sound.
Quick processing
While you are in the process of recording audio, your application needs to work quickly so that you do not miss out on important information. However, standard software would take a few minutes to start processing. But it is not the same when it comes to this online audio recorder.
Easy download options
The last but certainly not the least! This online audio recorder can be downloaded very easily. It comes in two variants which are created to support Windows and iOS devices. Besides, it doesn’t take a lot of time to set up and is also user-friendly.
Steps to using an online audio recorder
1. Download and install the software
The first step is to download the mentioned software from its official link. Once done, install it into the system so that it is ready to be used whenever required. Before downloading the online audio recorder, you can opt for the version that supports your system.
2. Run audio capture
When you are listening to audio which needs to be recorded, launch the application and set up the audio capture parameters. For this, the “Audio System” button should turn green. Also, make sure that there is no sound passed into the audio being recorded through your microphone.
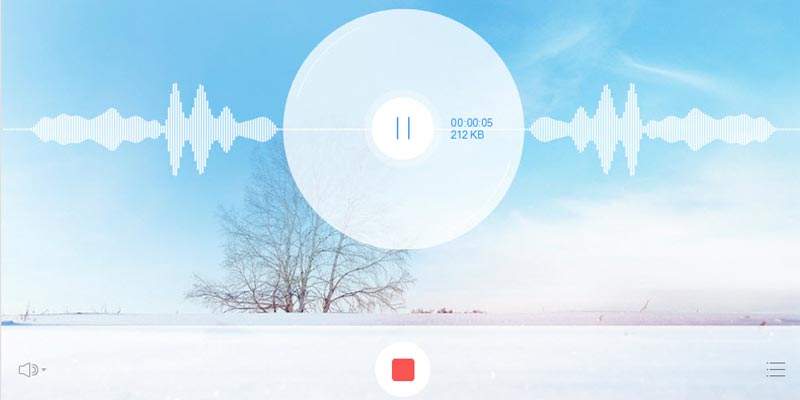
3. Start recording
After the parameters are set and you are happy with the configuration, you can move forward to actually recording the audio. This can be done by pressing on the “Record” button, which is present on the screen. The audio recorder should be turned on at least 3 seconds before you actually want to start recording so that you get the complete file. You also get an option to either stop, pause, or cancel the recording while in the process.
4. Saving the file
The last step for successfully recording an audio file is saving it in the correct format. You can use the “Save As” option and then select “Mp3” format to store the file in your system.
So, the next time you come across an important conversation, podcast, or music file that you want to save, use the online audio recorder.
To read more on topics like this, check out the technology category.